
Post and schedule on Instagram from your own website!
- You are a web designer and you want to add a social media publisher to the list of resources you offer your clients.
- You already use Zapier to automate some work flows and want to automate your Instagram without creating a new account on a different app.
To summarize what you will need to accomplish to make the Instagram Publisher work, you will essentially be creating an "Event" on your Google Calendar via a form submission, and then triggering an Instagram post when the calendar event starts. There will be two Zaps that you need to create, so if you are using Zapier's free account you should be able to get 50 posts a month out of this app as long as you do not have any other Zaps active. If you do have multiple Zaps and still want a free account, I would recommend creating a new Zapier account for the Instagram publisher like I did!
Step One: Create a Google Calendar
To get started you will need a Google Calendar that you want to dedicate as your Instagram Publisher. This is important, because your Instagram post will trigger from an event on this calendar, so you don't want to waste tasks by having events trigger a post on Instagram. I created a new calendar that I titled "Instagram Publisher," and I recommend you do the same so there is no confusion. With a unique calendar you can also embed it on to your site so you or your client can keep track of their scheduled posts on the same page they are scheduling them!
Step Two: Create a Form
In a perfect world, a Google Form would work to collect the information that you need to create an Instagram post. Unfortunately, the way that photos are hosted from the Google Forms does not work for their Zap because they are hosted in Google Docs rather than a CDN. In this case, you will want to create a form on your website builder. My favorite website builder is Duda, so that is what I used!
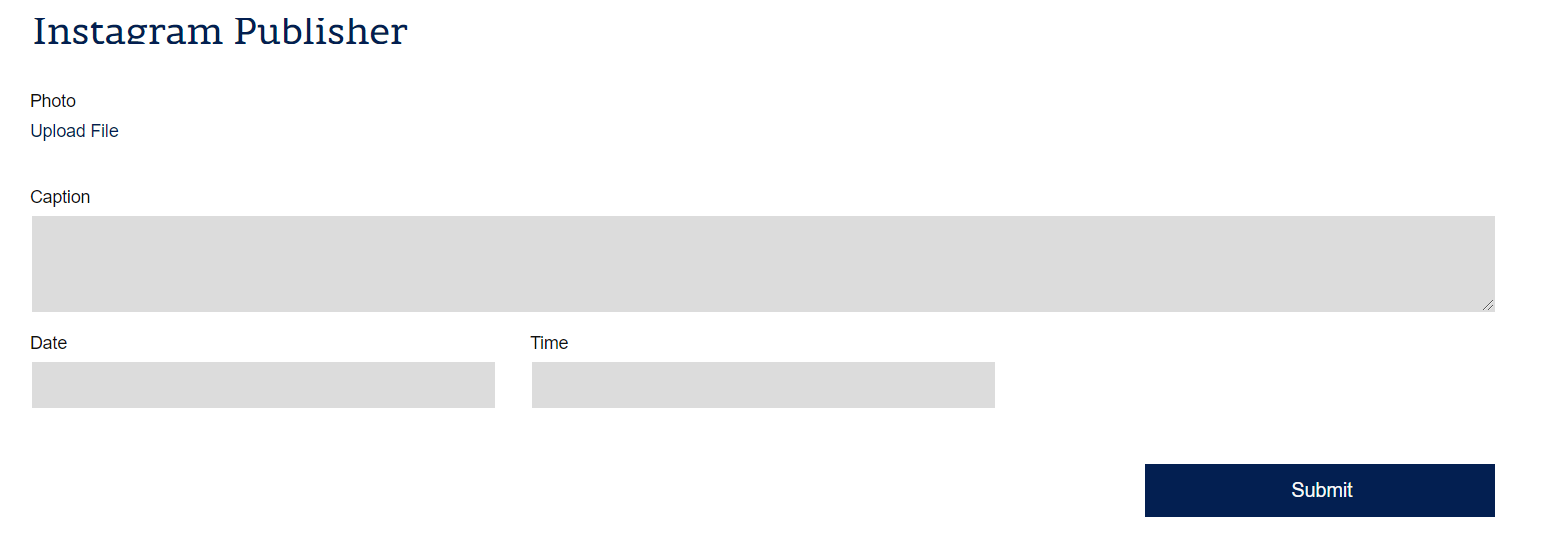
The fields I used were pretty simple:
- File Uploader to collect the photo
- Long Text to collect the caption
- Date
- Time
You can add other fields if you want to collect other information, but these four fields would be the only ones you need to make the Instagram Publisher work. My form looks like this:
Step Three: Creating the Calendar Event
Now it is time to jump over to Zapier to create the calendar event that will trigger your Instagram post. The goal is to connect the fields from the form to the fields in the Google Calendar event. This is not the most practical thing, since Google Calendar events don't have a spot for a photo or a caption, but with Zapier we can make it work.
It doesn't necessarily matter what field you choose, but the calendar event gives you the option to populate the "Summary" field and the "Description" field. I chose to connect the photo to the summary section and the caption to the description. The reason that the summary field works even though it seems like a text field is because the Duda form creates a URL for the hosted photo on AWS, and that is what is tranferred via Zapier. That is why a Google Form doesn't work because that URL is not hosted correctly to be transferred via Zapier.
Take the Date & Time sections of your form and put both in the "Start Date & Time" field and the "End Date & Time" field. Be sure to add a space in between the Date and Time entries because otherwise Zapier will read it incorrectly.
You can reference the photos below to make sure that you have everything set up correctly:
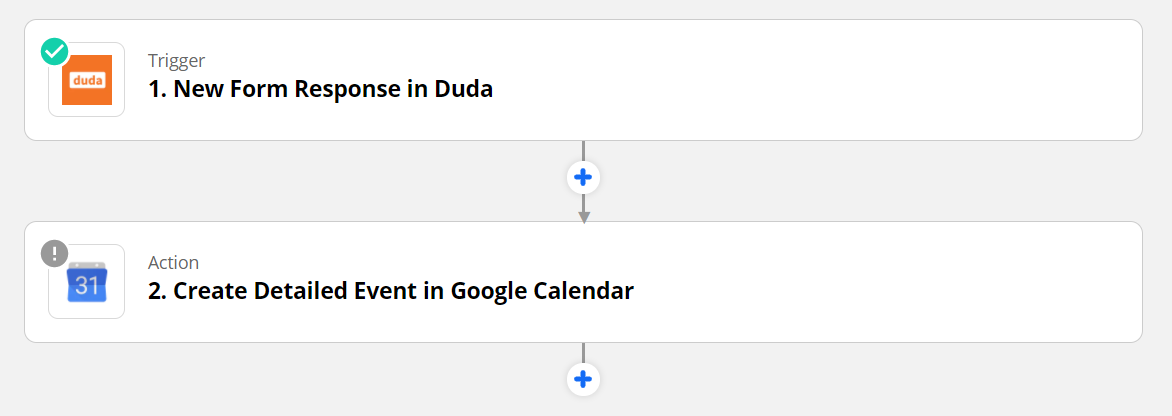
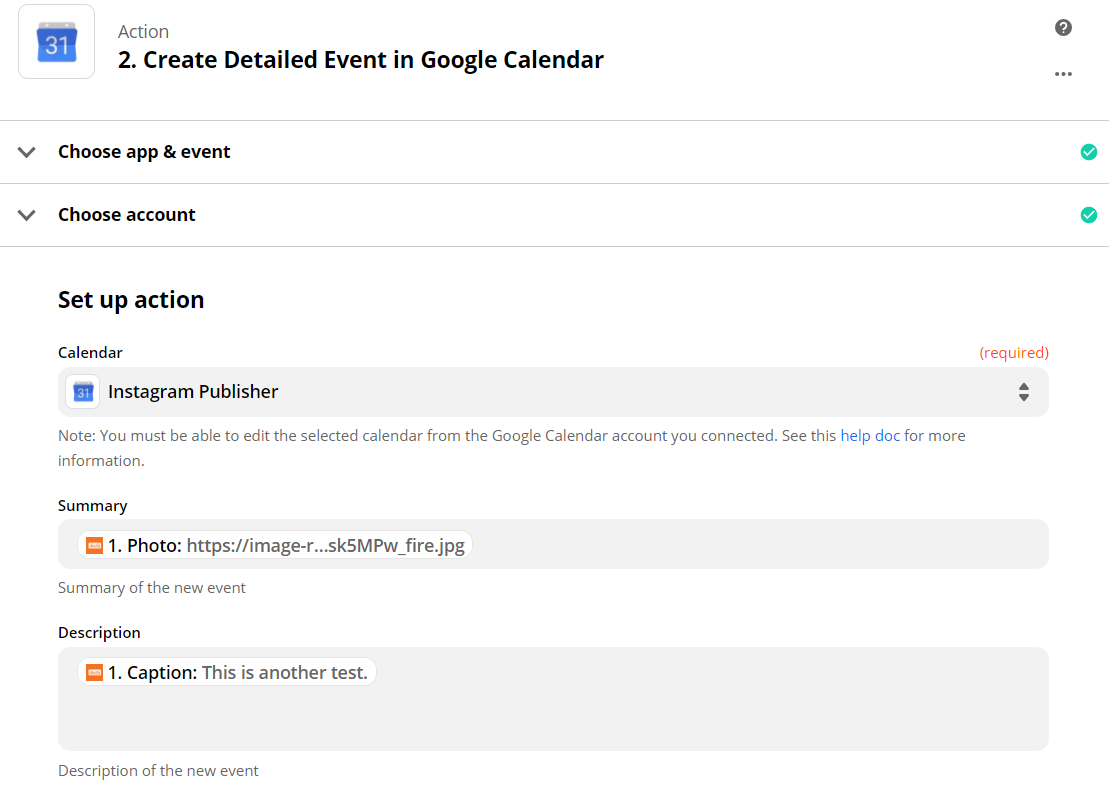
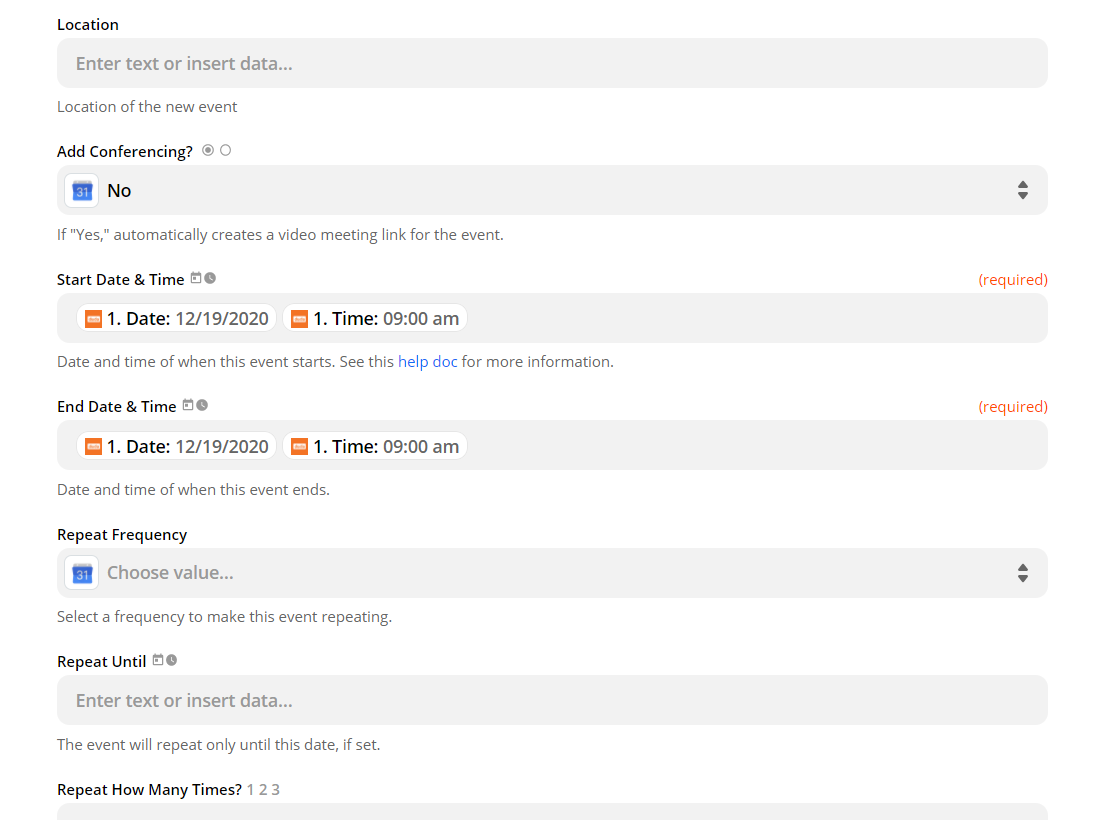
You can click to enlarge if that will help.
Step Four: Scheduling the Post
After you test to confirm that your form submissions are creating a calendar event, you will now need to create another Zap that triggers the Instagram post. Your trigger for this Zap will be the Event Starts and the Action with be to publish a photo on Instagram.
Make sure when you are setting up the Trigger for this Zap (Event Start in Google Calendar) that you select the right calendar that you are dedicating as your Instagram Publisher, and set the "Time Before" section to zero. If you don't edit the Time Before section it will default to fifteen minutes early meaning that your post will go out 15 minutes before you want it to.
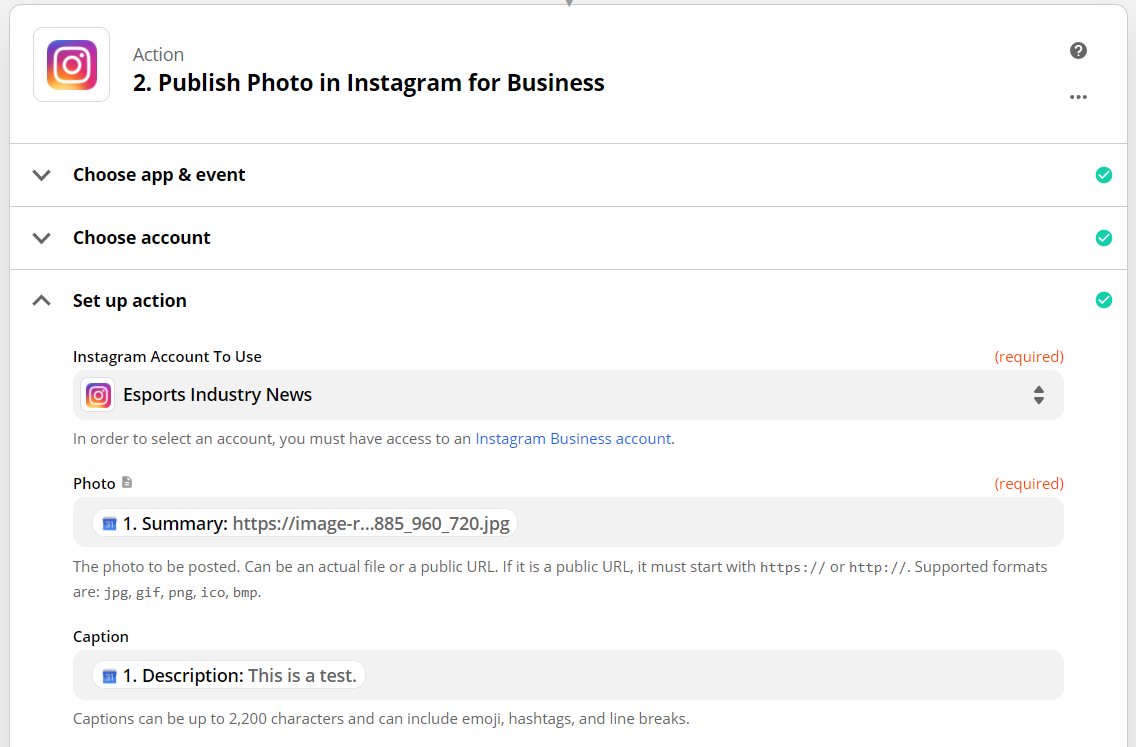
When you are setting up the Instagram portion of this Zap, you simply have to match the "Summary" section which contains the photo URL and the "Description" section which contains the caption and you should be good to go.
Important: In order to use Instagram, make sure that you make your account a Professional Account otherwise this Zap will not work.
Here are some photos to help you reference everything I just mentioned.
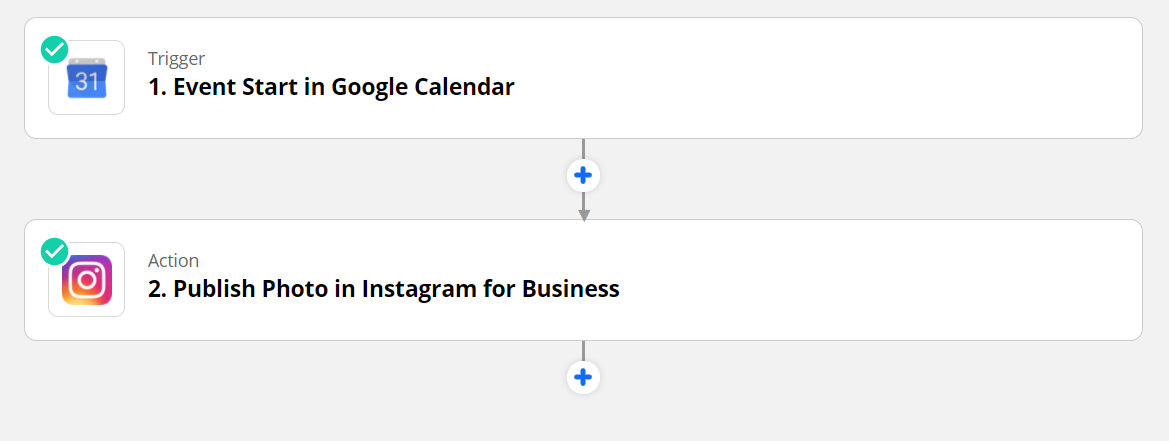
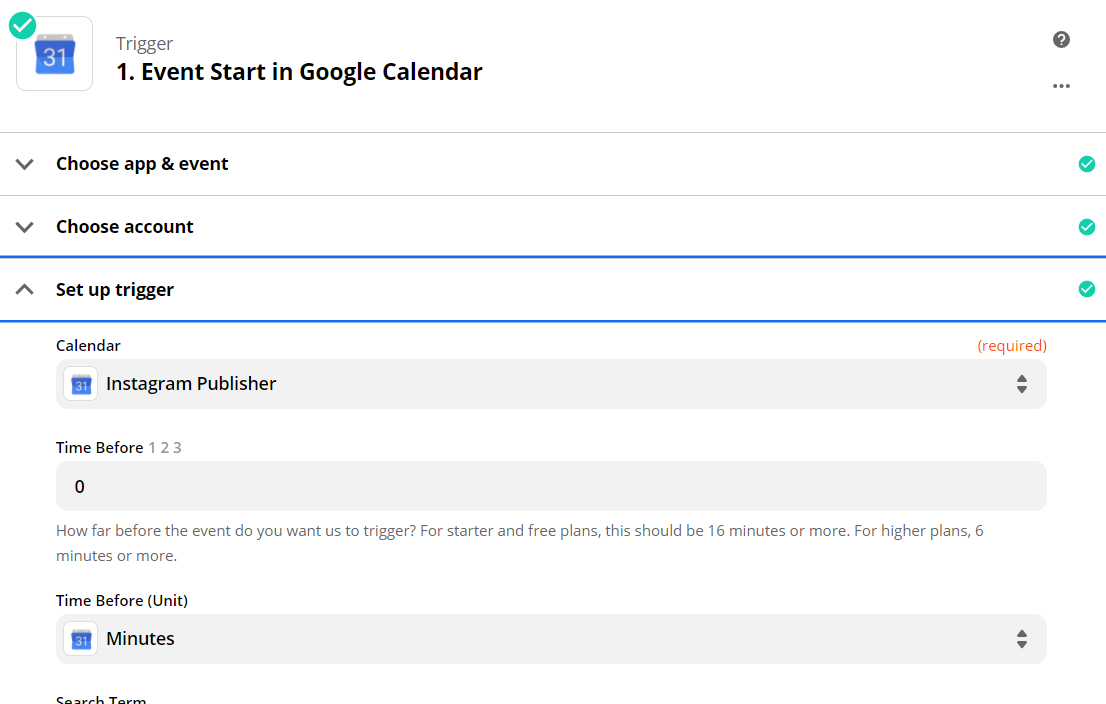
You can click to enlarge if that will help.
Wrapping Up:
Once you have your two Zaps set up, you can begin scheduling your Instagram posts from your own website! Like I mentioned earlier, I embedded my Google Calendar underneath my scheduling form so I had my own "Hootsuite-like" Instagram publisher where I can schedule and keep track of my posts on one page. You could take this even further if you wanted, but I just wanted to explain the simple Instagram Publisher that I mentioned in my previous blog post.
Important: If you ever need to delete a scheduled post, you can only delete it from the Google Calendar to ensure it does not post.
Thank you all for reading this post. If you have any questions, feel free to send me a message via email or LinkedIn. If you found this helpful, please consider subscribing for more ways to make you and your team more efficient with Zapier.