
Easily keep track of your portfolio with the help of Google Sheets, while automating notifications!
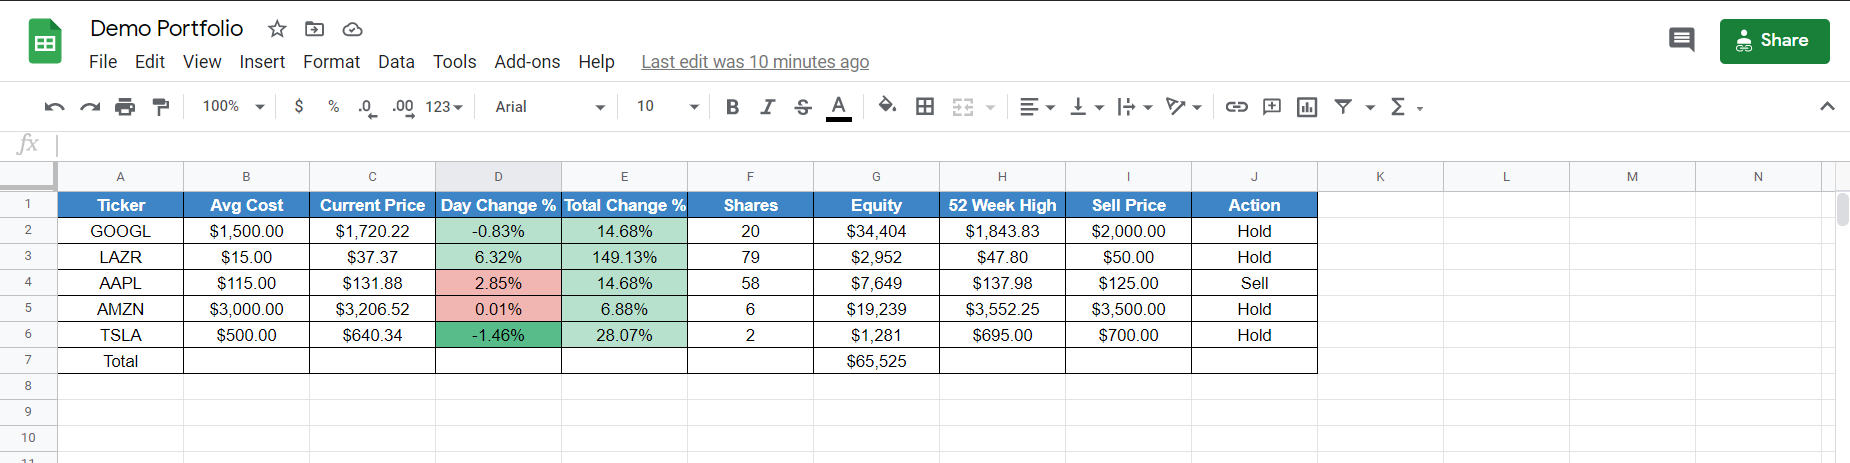
Once you copy and paste the sheet above to your own Google Sheet, you will need to update a few things.
First, if you are tracking your portfolio, you will need to update the "Ticker" column with all of your stocks. The Ticker symbol will tell the rest of the row what stock you are tracking. This is all done through the Google Finance function in the other columns that pulls directly from Google Finance's database of stocks.
For the stocks that you own, input your average costs in the next column. This will keep track of the "Total Change %" in the fifth column so you can see how well your stocks are performing.
The other two columns you need to worry about are of course the number of shares you own, and then your Sell Price." The "Sell Price" column is the most important for this automation. That is because the "Action" column is triggered based on that price. You can also use the "Sell Price" column as a "Buy" column for stocks that you don't own, given that our automation will be triggered based on any change in the "Action" column. What I mean is, set that number at whatever you are either looking to sell at for stocks you own, or buy at for stocks you are just monitoring. Currently, the template uses "Hold" and "Sell" as the two actions, but you can replace "Hold" with "Buy" if you intend to use this automation as an indication on the right time to buy.
Now let's get to the notification. Let me explain with the following steps:
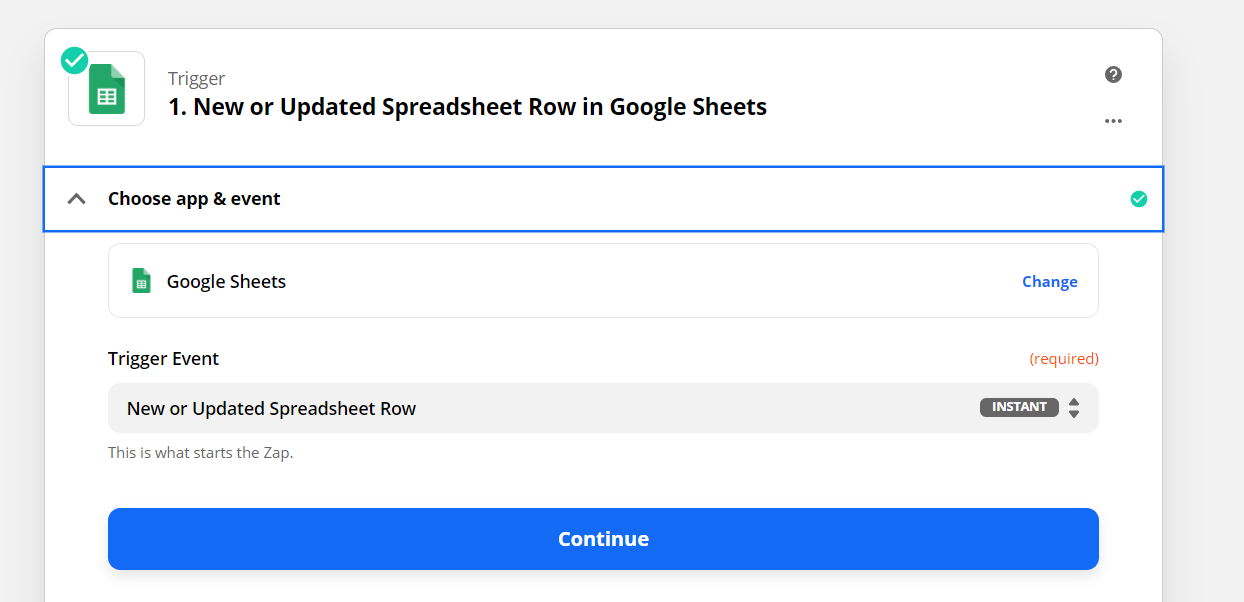
Step One: The Trigger
After you hit "Make A Zap" to initiate the integration, you will want to select the Google Sheets App. As you can see in the photo above, you will want to select "New or Updated Spreadsheet Row" as the Trigger Event. This means that your notification will be triggered based on a new or updated row in the spreadsheet. We can get even more specific in the next step.

Step Two: Set Up
Now you will want to get even more specific with your trigger. You will want to select the Spreadsheet from your Google account where you pasted the portfolio template and select the correct Worksheet from within that Spreadsheet.
The Trigger Column is the most important part of the set up. Remember earlier when I mentioned the "Action" column will trigger the event? Well this is where you can set that up. When you click on Trigger Column, it will launch a dropdown with all of the columns in your spreadsheet. Realistically, you could set it up to get notifications based on any change, but that would be a lot of notifications given the volatility of the stock market. The Action column will notify you at the best time to buy or sell, which is what you really want to know.
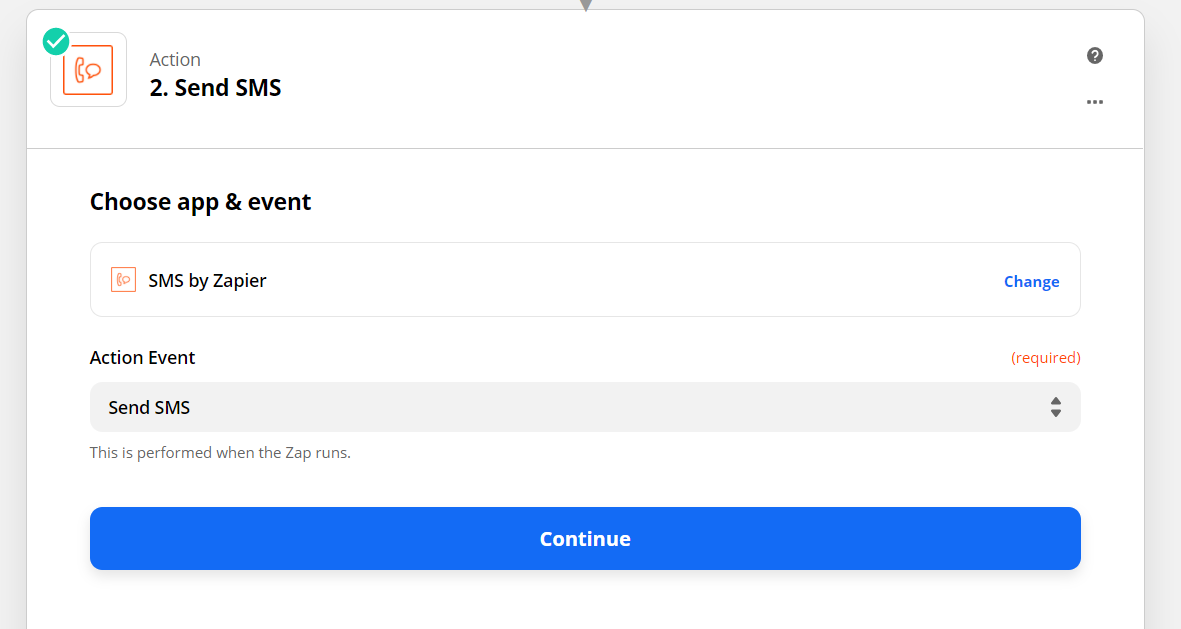
Step Three: Action
This step is how you would like to be notified. You can see above that I chose to be notified via SMS (text message), but you could really set it up however you would like. You could get an email, a Facebook Message, WhatsApp, or any other way you would like to receive a notification. With SMS, you have to register your number with SMS by Zapier, and they will send a few test messages to make sure everything works.
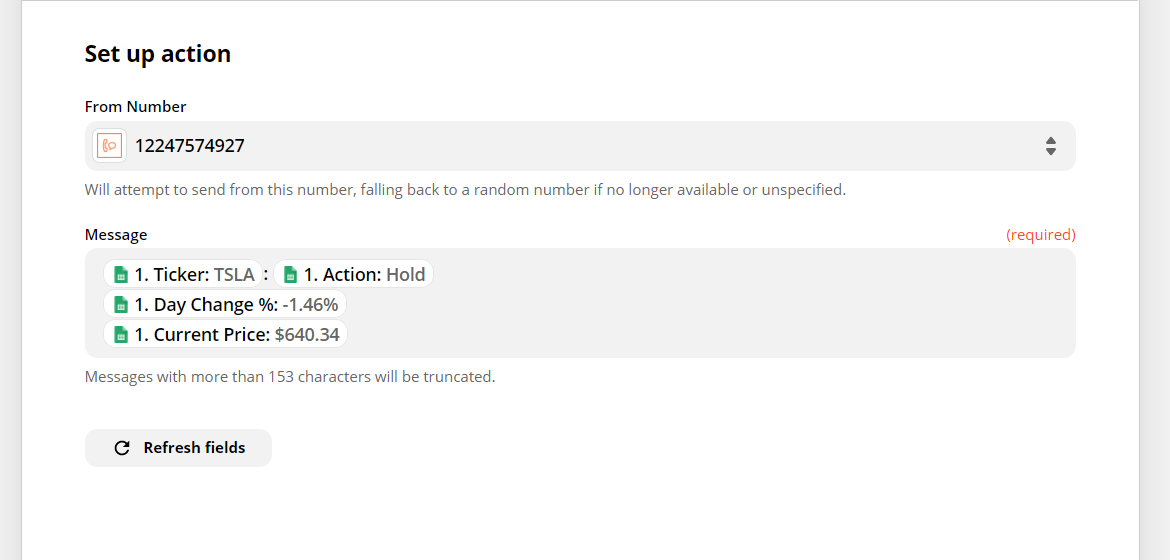
Step Four: Set Up Action
Finally, you just need to set up your action. I chose to have the "From Number" be one that Zapier provides, but they do have the option to choose Random if you don't mind it coming from different places. One number seems more logical so you can create a contact with that number as long as it remains available.
The content of the message is at your discretion. You can see above that I chose to do the Ticker Symbol with the Action Column, followed by the percent change that day, with the current price. You might even want to add a link to your Robinhood account or wherever you do your trading so you can quickly jump over and buy or sell your stock.
Once this is set up, you can run a test message, and as long as everything checks out okay you can turn on your zap and it is ready to go!

Thank you for taking the time to read my blog, I hope you found this automation as helpful as I do. It's like having your own financial assistant to help you find the best time to trade for FREE.
If you found this helpful, please consider subscribing for more articles on automating some daily tasks, and other fun business-related articles. For example, here is an article breaking down three ways Zapier can help your small business! Please reach out via email or LinkedIn if you need help with any of your Zapier integrations!